

how to use cricut stencil vinyl
Cricut® Stencil Vinyl is my new favorite product to use to make a stencil. Here's why:
- it's affordable
- readily available
- clear
- self-adhesive
- grid lines
- durable
- repositionable
- adheres to wood, canvas, plastic, paper, and more
How and Why to Use Cricut® Stencil Vinyl
Cricut® Stencil Vinyl

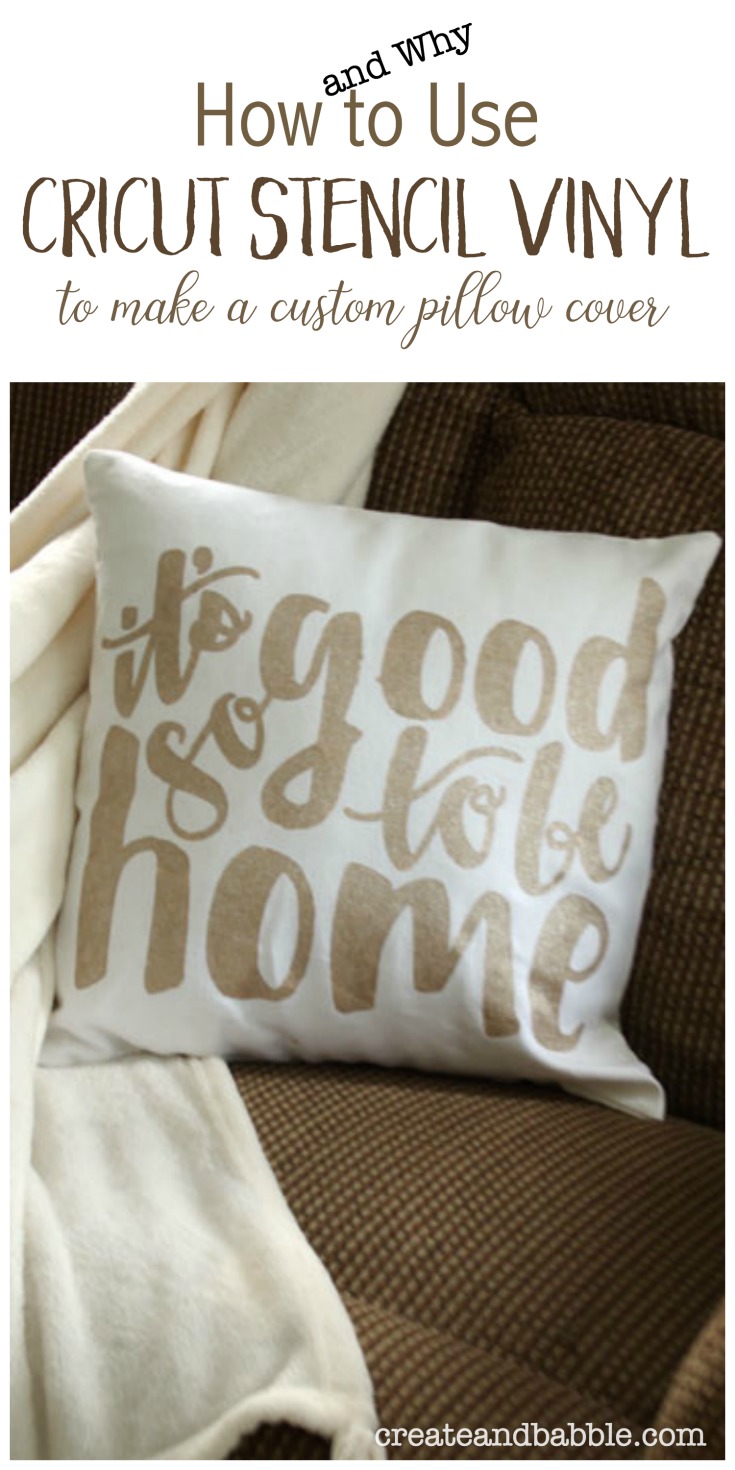
In this tutorial, I'm going to show you How and Why to Use Cricut® Stencil Vinyl and how easy it is to make a custom pillow cover. Whether you have a Cricut® or a Silhouette® machine, you can use the Cricut® Stencil Vinyl in either machine. I used my Cricut Explore Air2 for this project.
Step One
Choose or make a design for your stencil. I chose to use a design that I found in the Cricut library. I clicked on the image to choose the file and clicked on "customize" so that I could enlarge it. Once it was the size I wanted, I clicked on "Make it".

Step Two
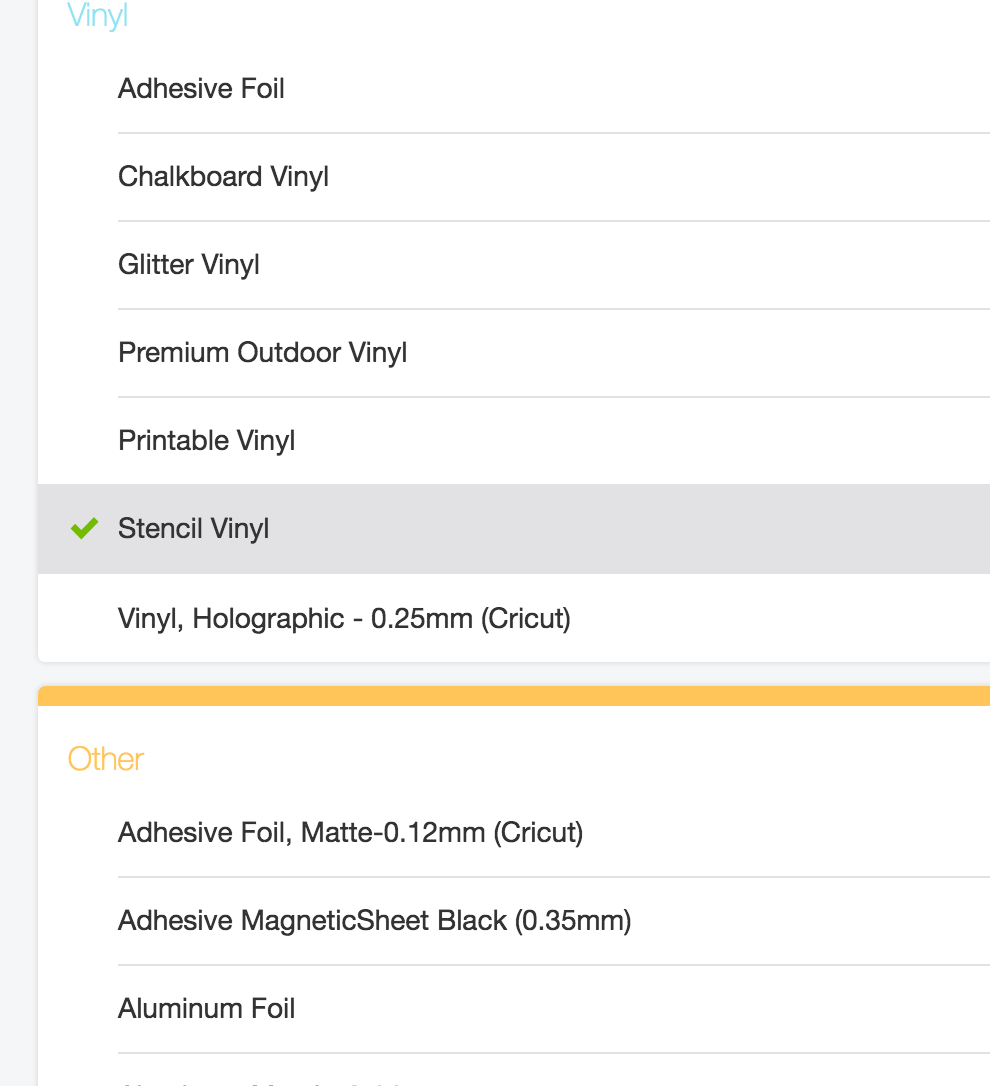
Change the dial to "custom" and choose Stencil Vinyl under Vinyl
Step Three
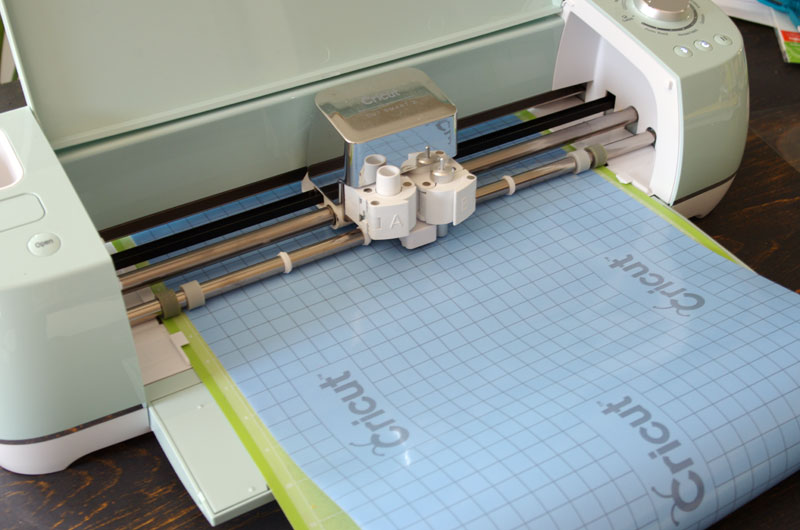
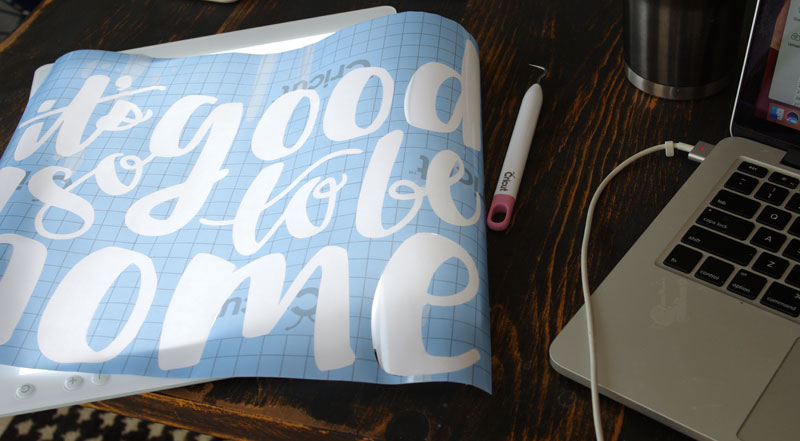
Place the stencil vinyl on the cutting mat, grid side up. Insert mat and cut!
Step Four
After the Cricut® is finished cutting, remove the mat then remove the stencil vinyl from the mat. Now you are going to weed in reverse. Instead of removing the vinyl around the letters, you'll be removing the vinyl letters themselves.
I used the Cricut® Bright Pad for the first time. It was so easy to see the cut lines using the Bright Pad!
Step 5
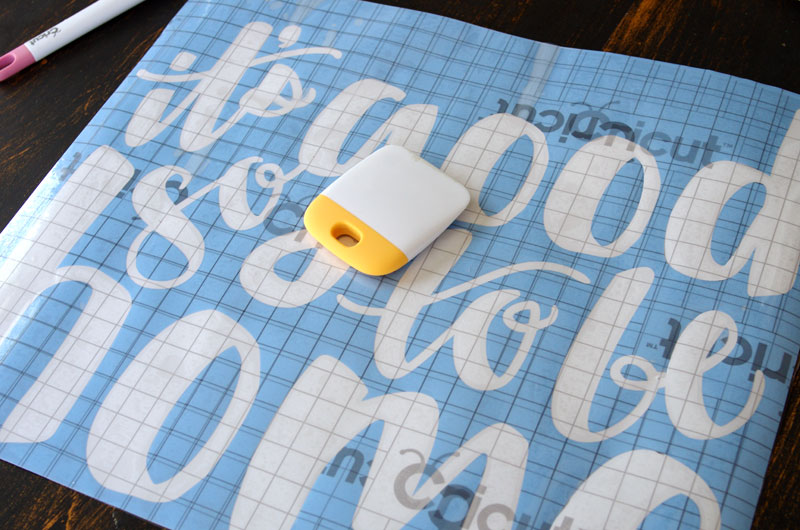
Carefully apply Cricut® Transfer Tape over the stencil using the grid lines to help you keep everything straight.
Step Six
Pull up transfer tape making sure that the "insides" of the letter loops transfer to the tape too. Take your time with this step.
Step Seven
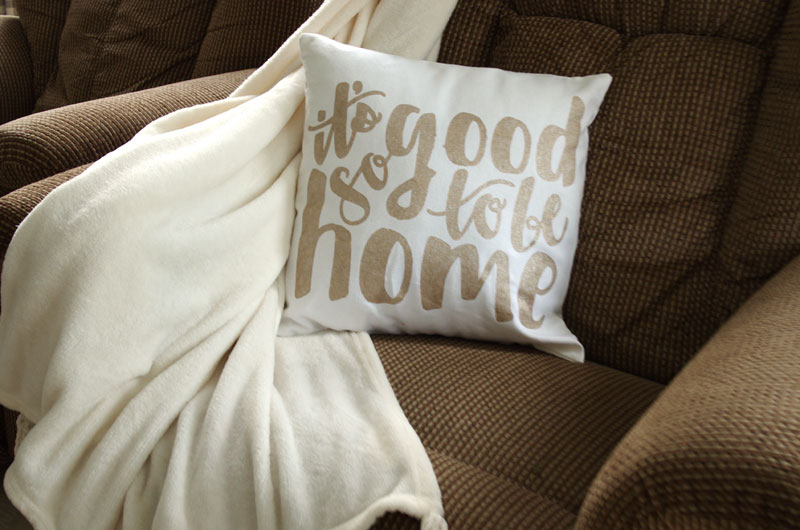
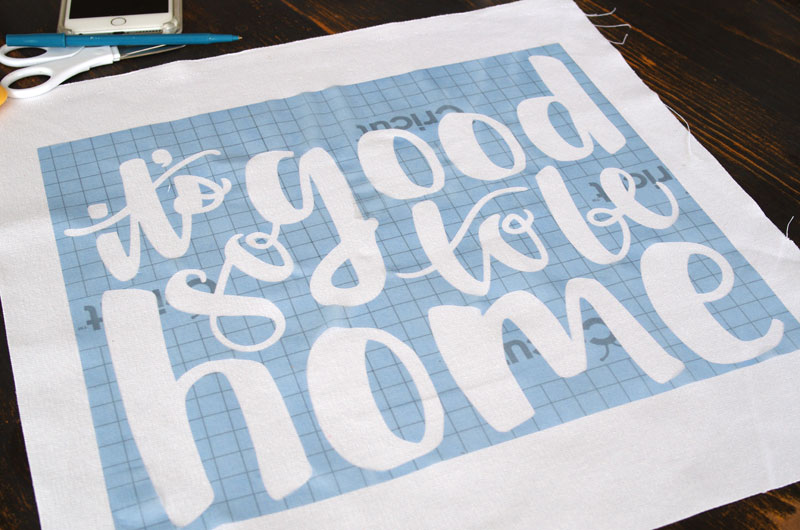
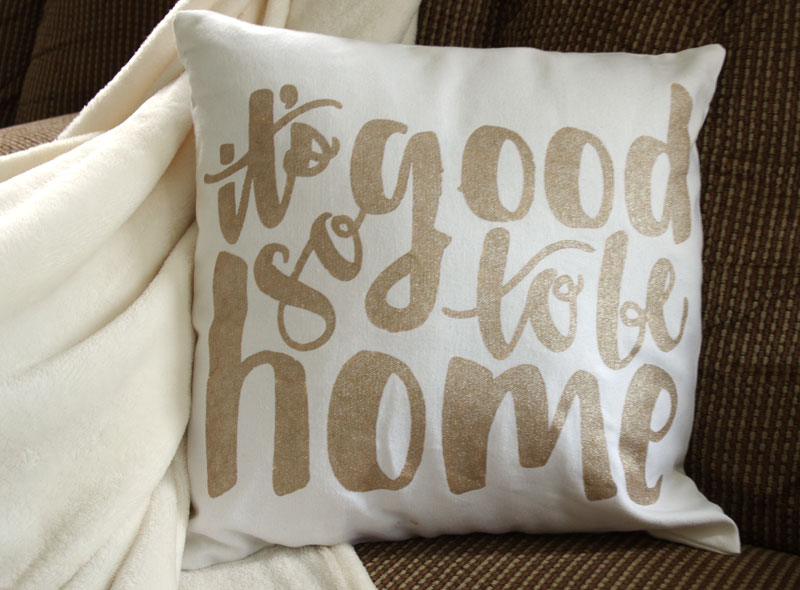
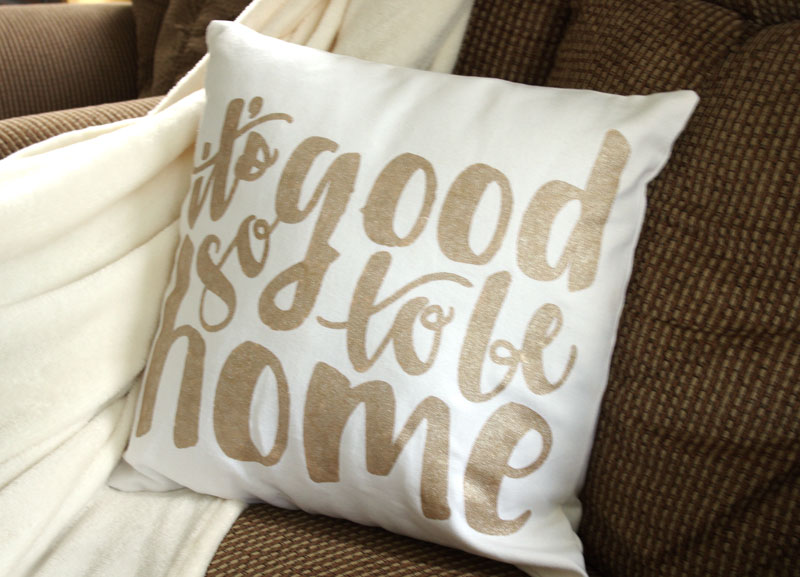
Place stencil on a plain pre-made pillow cover or fabric that you're using to sew your own pillow cover. That's what I did. I have so many pillow forms so I cut two squares of white duck cloth fabric slightly larger than my pillow form. I applied the stencil to one of those squares.
Step Eight
It's time to paint!
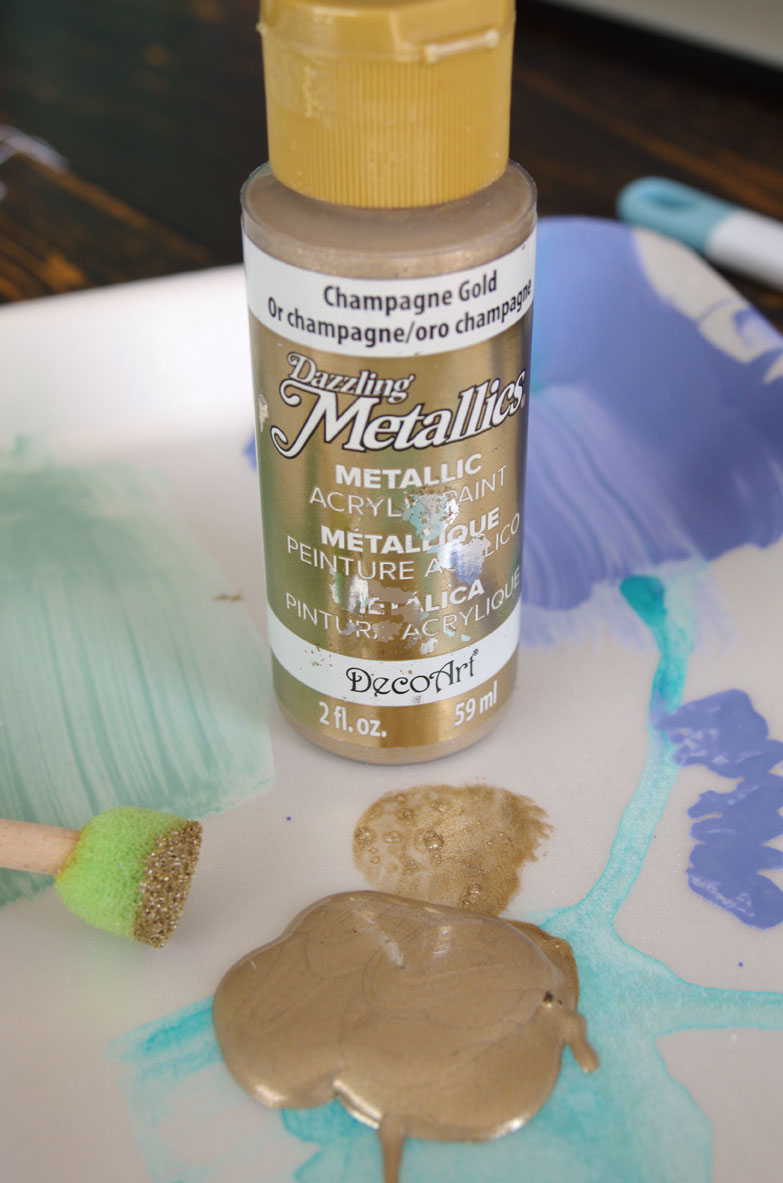
So grab your favorite paint and get stencilin'. I love the Dazzling Metallics paint by DecoArt. I love the gold shimmer of this Champagne Gold color.

Since the stencil vinyl is adhesive, there is less chance of the paint seeping under the stencil but it's still a good idea to apply a few light coats of paint in a straight up and down daubing motion.
Carefully remove the stencil while the paint is still wet.
Step Nine
Once the paint is dry, go over lightly with an iron to set the paint and then insert pillow form into pre-made pillow cover OR sew your pillow cover together and then insert your pillow form.
Step Ten
Stand back and admire your new pillow!
Click here for more Cricut tutorials.
Click here for more Silhouette tutorials.
How to Stencil Fabric

how to use cricut stencil vinyl
Source: https://createandbabble.com/how-and-why-to-use-cricut-stencil-vinyl/
Posted by: stephensyough1967.blogspot.com
0 Response to "how to use cricut stencil vinyl"
Post a Comment